Mega Menu
Go to Dashboard > Appearance > Menus. Create your menus as described in section Menus > Create New Menu
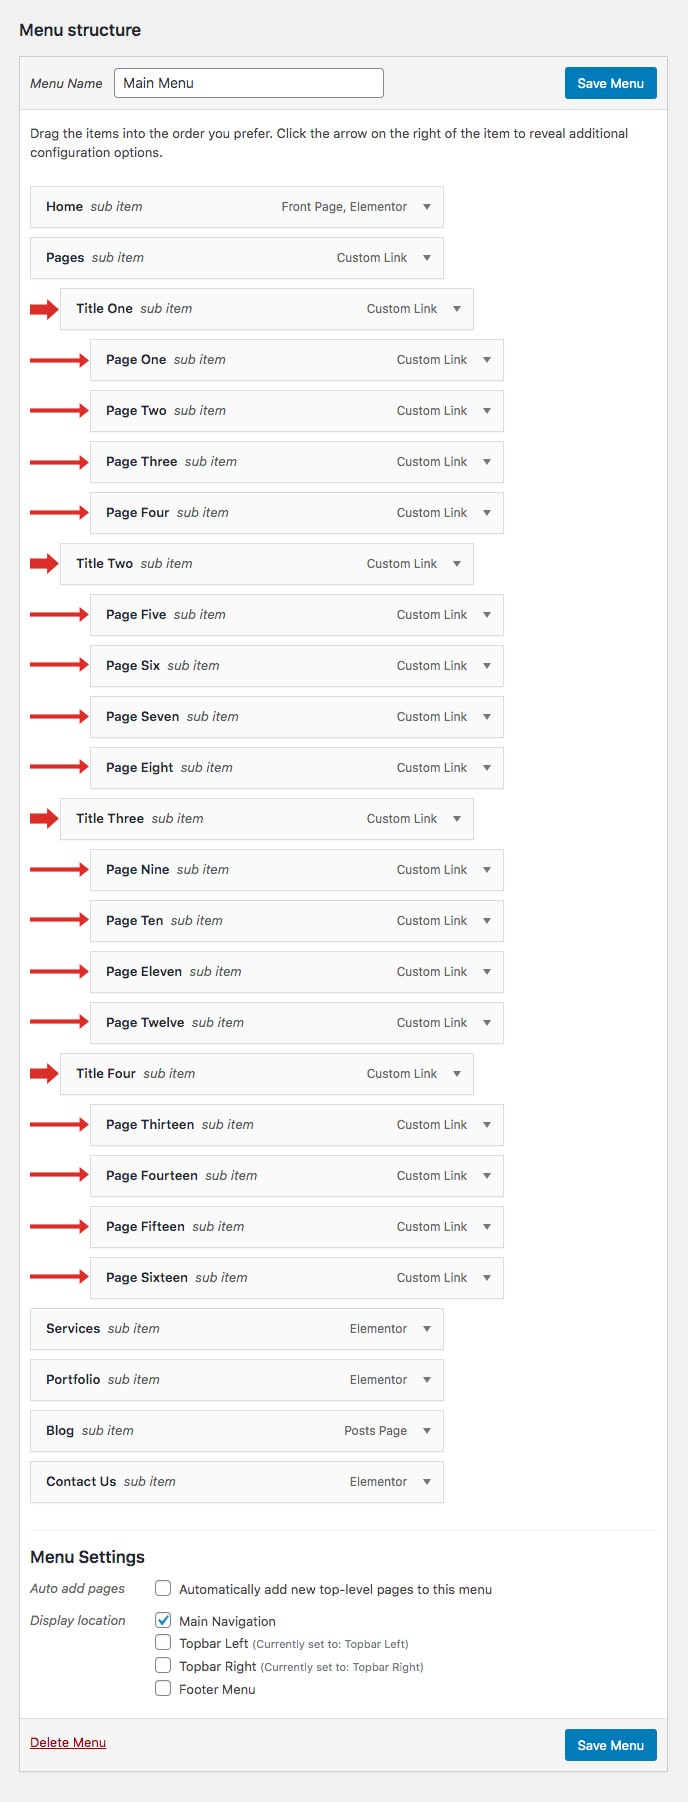
In order to make mega menus, your menu structure must contain min. three levels, where your:
- First level represents your main menu item
- Second level would be a title of the grouped submenu items
- Third level would contain the actual submenu items
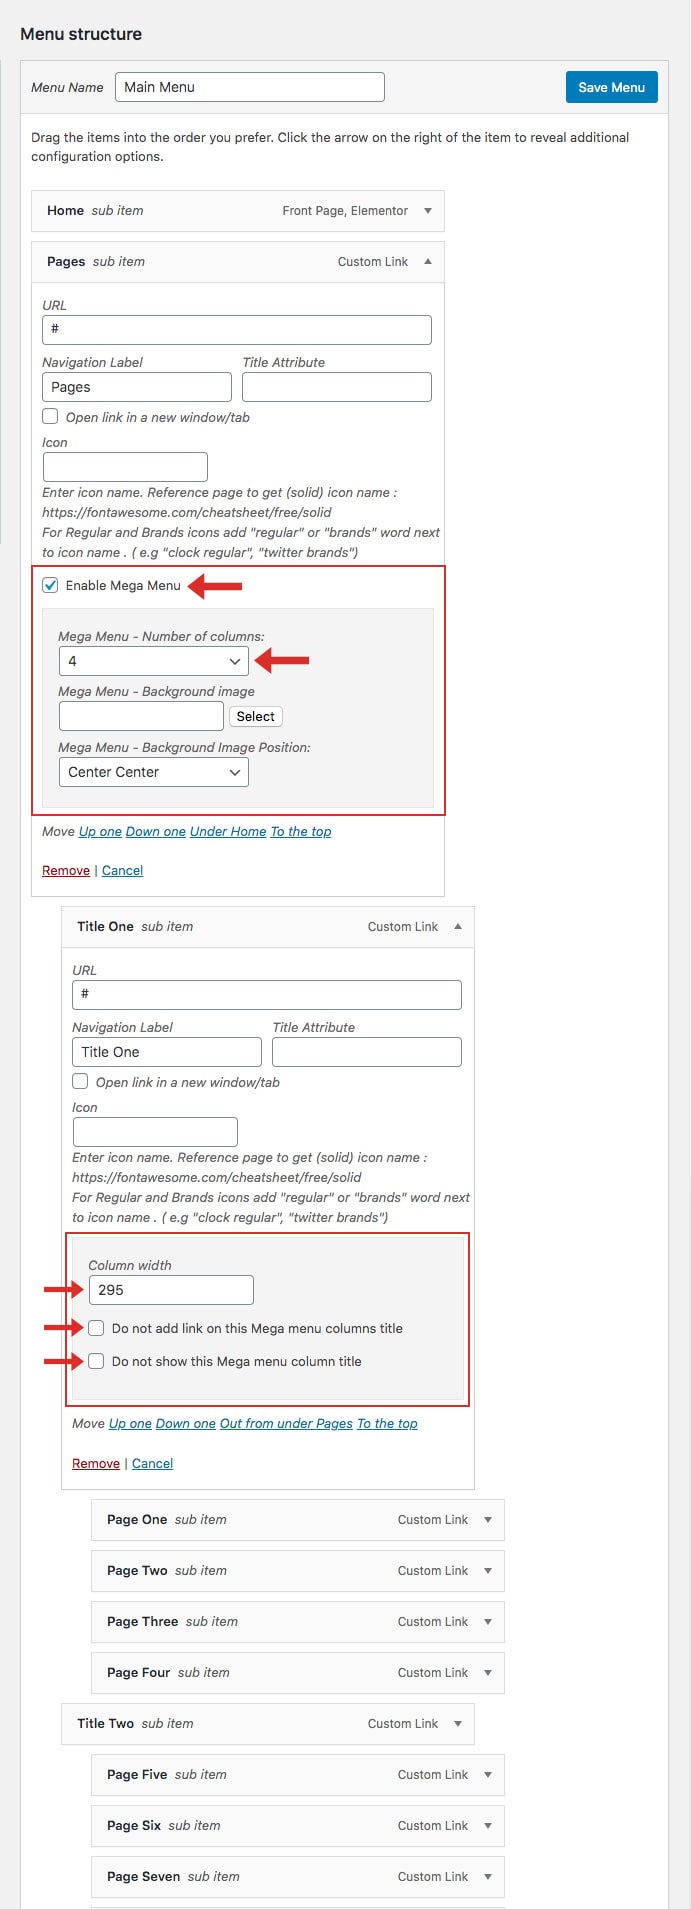
Now open your first level menu item. Here you can make general settings for your mega menu. You will see following options:
- Enable Mega Menu : With this option you enable the mega menu for this menu item.
- Number of columns: Here you can define the number of columns to be displayed in your mega menu
- Background image: If you wish to use a background image in your mega menu, here you can define this image.
- Background Image Position: Here you set the position of the background image you have chosen previously.
Now open your second level menu item. You will see following options:
- Column width: Define the width of your first column in mega menu layout
- Do not add link on this Mega menu columns title: If you don’t want to make your submenu title clickable, here you can deactivate it.
- Do not show this Mega menu column title: In case you don’t want to display the submenu title, here you can hide it.
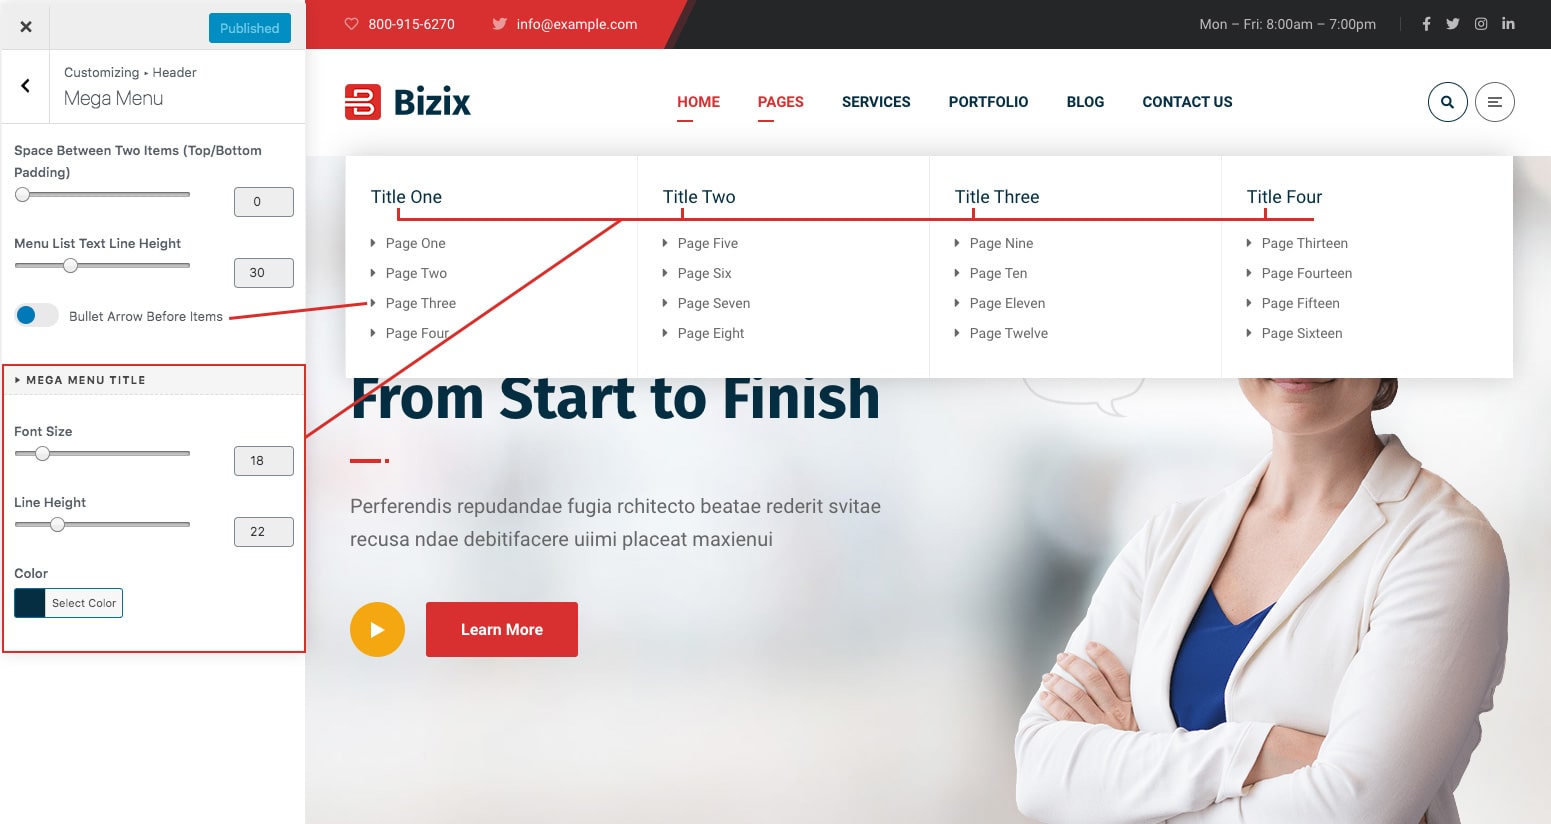
Mega Menu Customizer Options
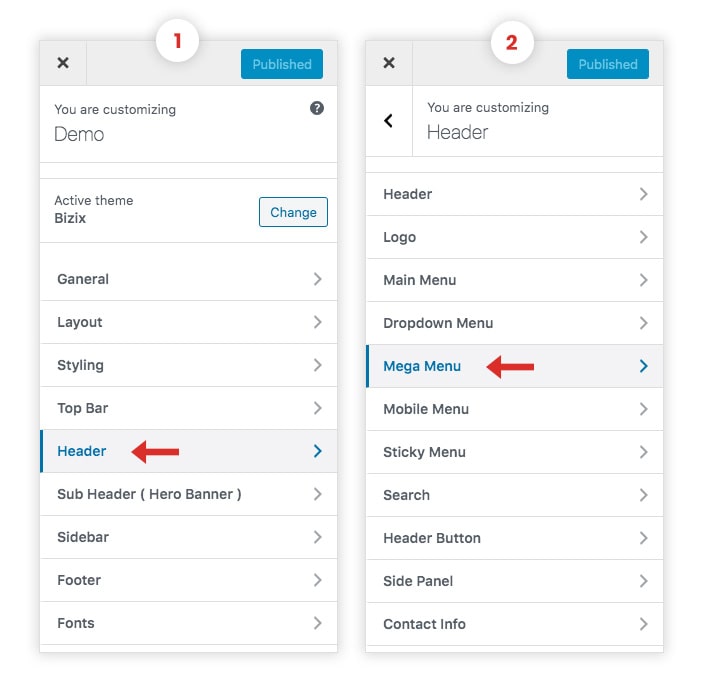
- Go to Dashboard > Appearance > Customize > Header > Mega Menu
- Edit mega menu title font size and color, sub menu items line height, space between two sub menu items, show/hide bullet arrow before items.
- Click on Publish Button.